Some important plugins for wordpress

You might be aware of the WordPress plugins. Yet, I’ll paste it for our convenience.

WordPress plugins are bits of software that can be uploaded to to extend and expand the functionality of your 
WordPress site.

We will have to admit, plugins are really useful and come to our rescue most of the times. Loaded with great features, it makes our life easy; else it would be hard to code for the each dedicated feature. Now, there are many plugins which you can use. Here, I am listing very few names which one can install while configuring a new WordPress website. Gradually, I’ll try to list few more names for the dedicated feature in next posts. Let me know in the comment section, if you have any suggestion. So, here we go.
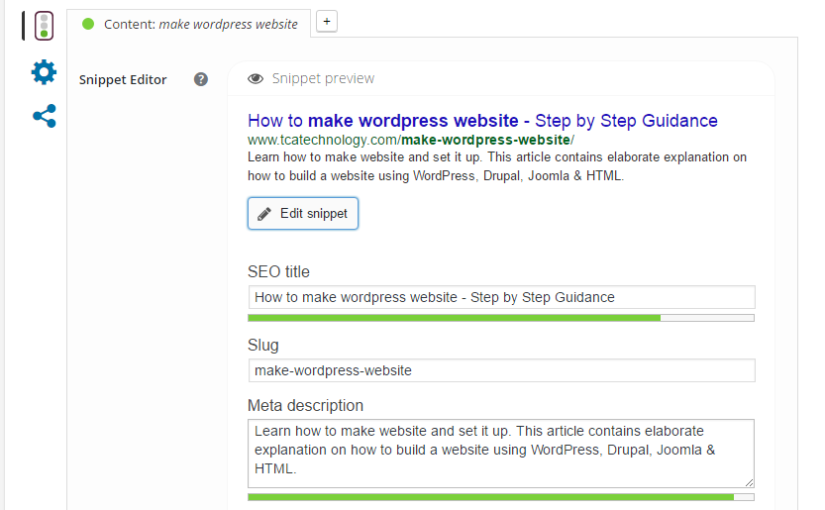
1. Yoast SEO

It is one of the best and most complete plugin for SEO in WordPress. Packed with great features, it allows you to insert meta description, choose a keyword and put an SEO description. Download this plugin from here.
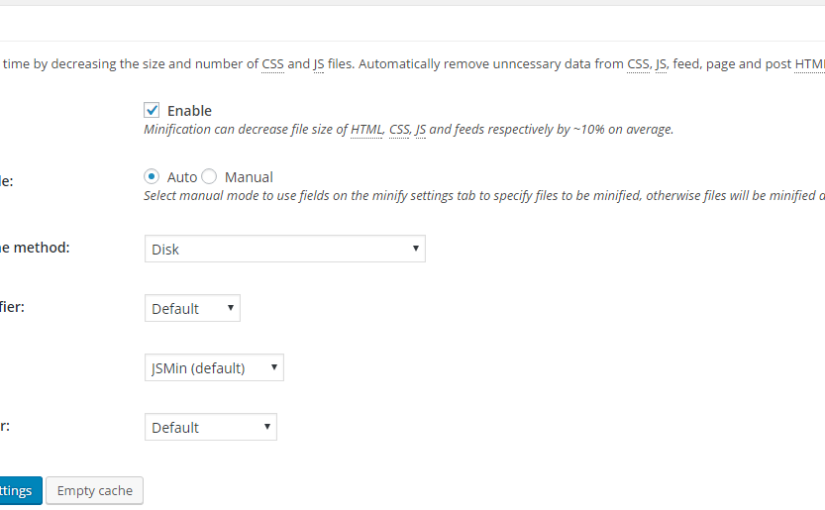
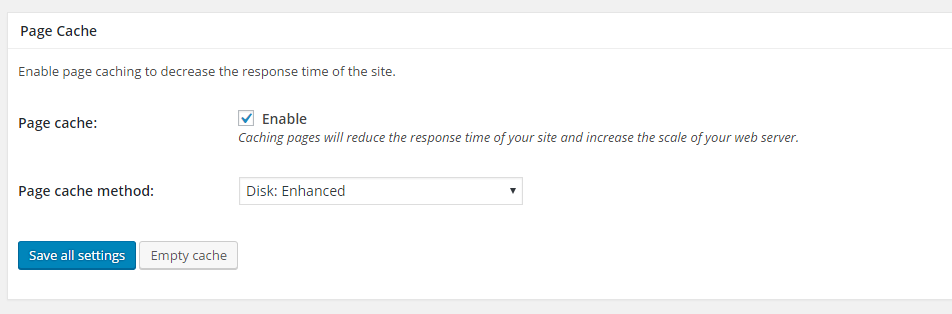
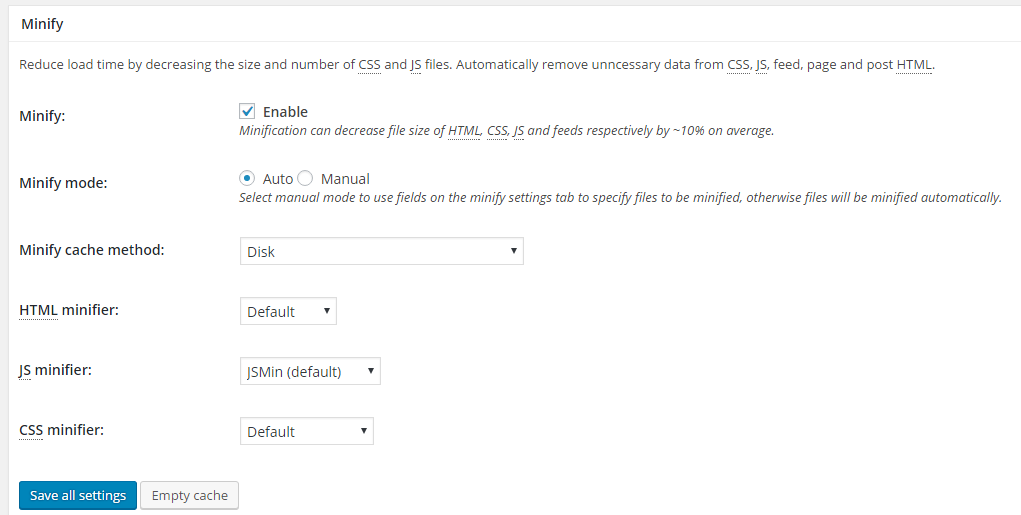
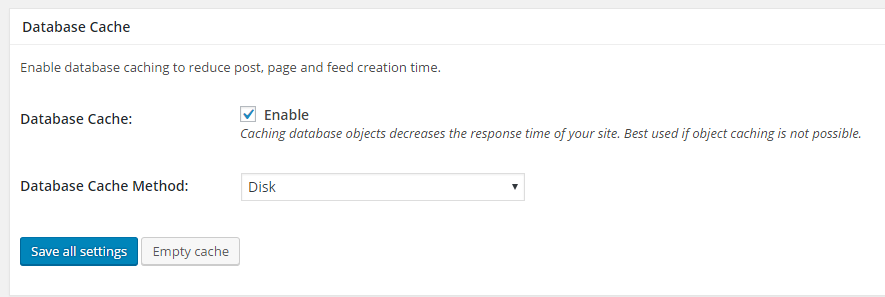
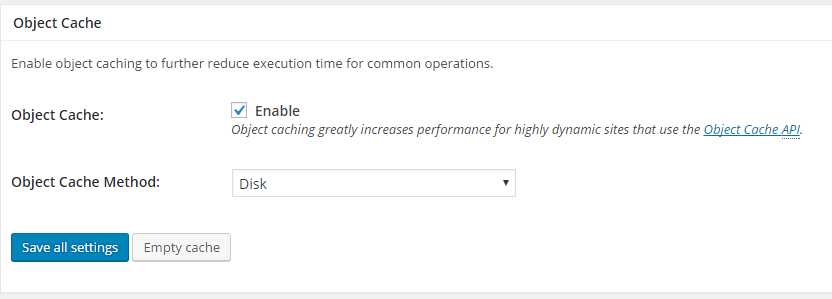
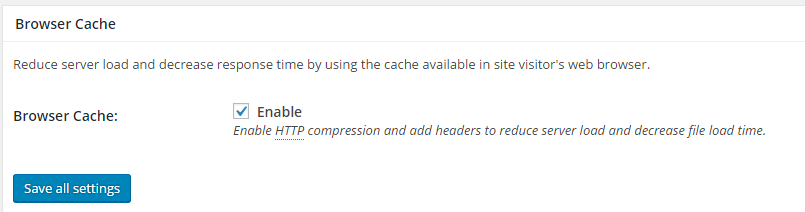
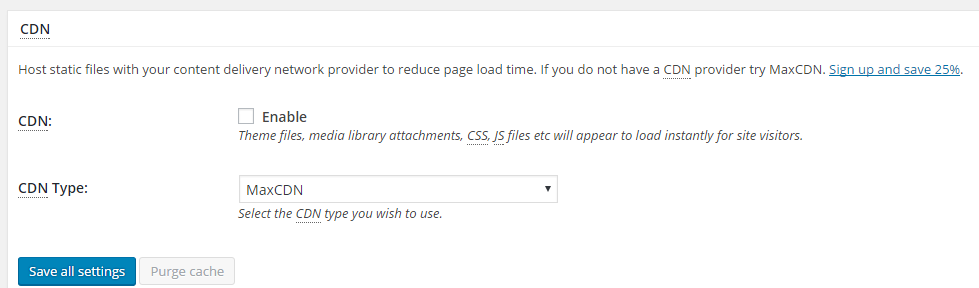
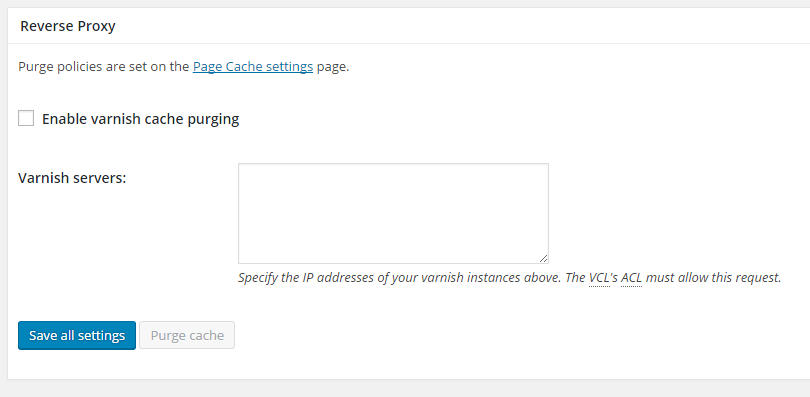
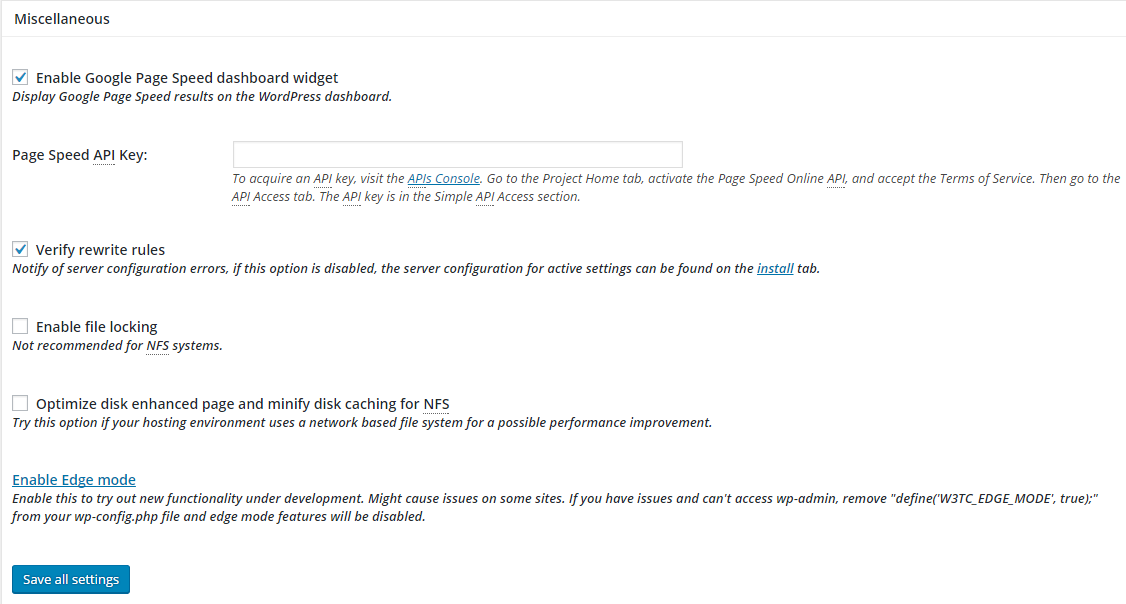
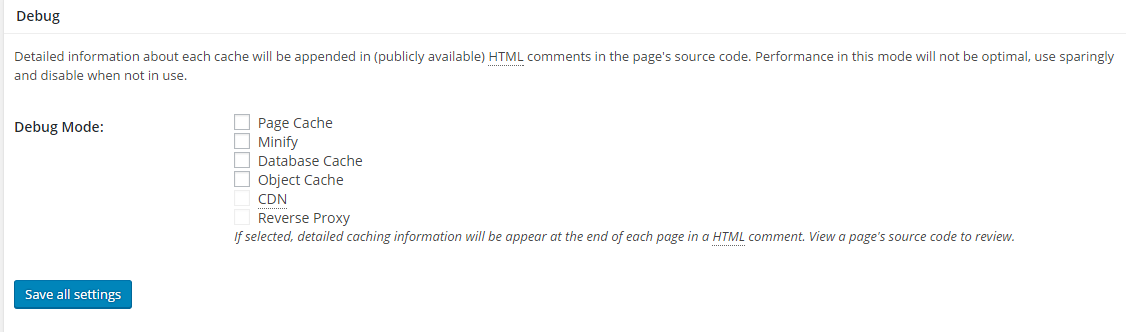
yoast seo

2. W3 Total Cache 

A powerful plugin for to increase the website speed. Click on the link to get complete details on how to configure W3 Total Cache for optimum use. Link to download the plugin.

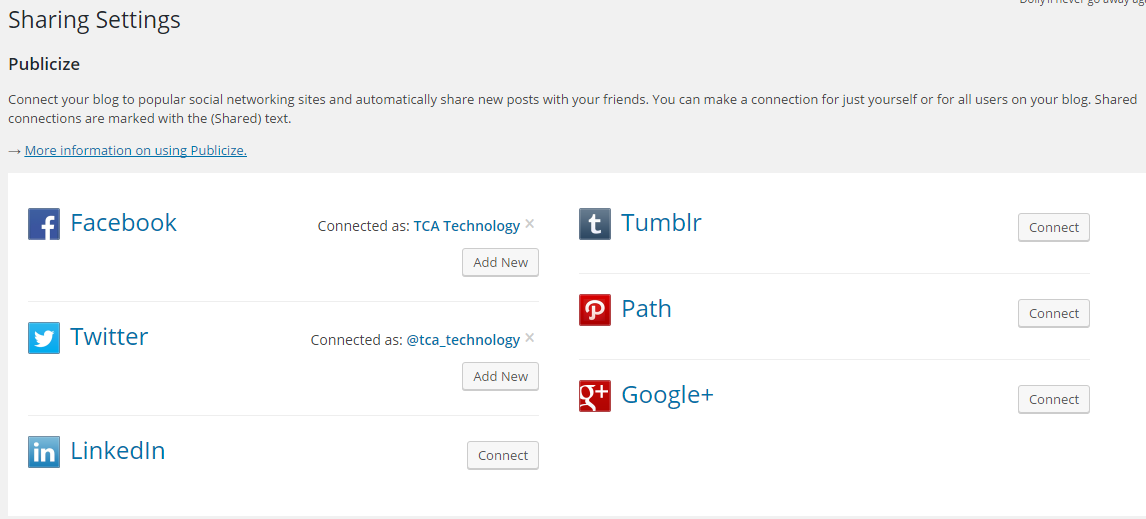
3. Jetpack by WordPress.com

One of the most powerful plugin in WordPress – Jetpack. User interface is very friendly, and it allows you to do almost everything ranging from managing social media, blog posts, comments and much more. At the top of it, it makes your website fast.  Download the plugin here.
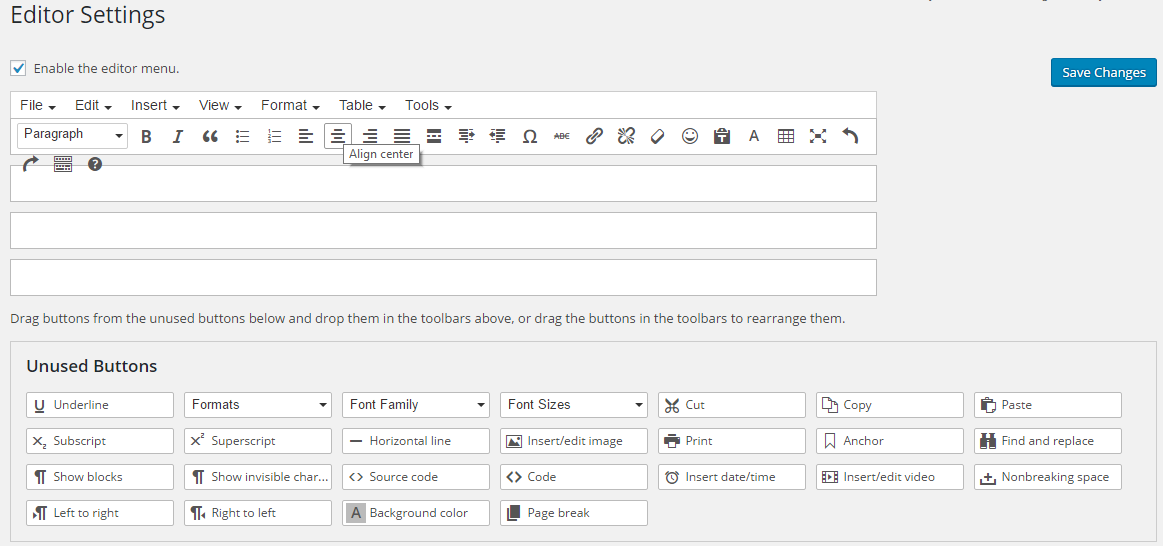
sharing settings


4. TinyMCE Advanced

Helps you arrange, add, remove the buttons shown in the Visual Editor toolbar in your WordPress Editor. Download the plugin from here. 

editor setting

That’s all for now. In the future, we are coming up with many more articles. Sign up for your newsletter to remain updated.

Why use W3 Total Cache Plugin – It’s importance and ways to configure it

W3 Total Cache

I was just browsing the internet when the title of one article caught my fancy.  I clicked on the link but to my disappointment, I failed in reading that article even after refreshing the page some 15-20 times. It wasn’t that my internet speed was low. I am sure, you all might have experienced it sometime. There are some websites which open at the click of the mouse while some make us wait till eternity.


Everyone wants a fast loading website. Don’t you? Apart from decent web hosting, beautifully coded plugins, you need to ensure that you have a content delivery network (CDN) and you are using a proper caching. We are lucky we W3 Total Cache to serve this purpose for WordPress website. In this article, we are going to show you the step by step guidance on how to install W3 Total Cache and configure it properly to get the maximum benefit.

So here we go…


How to install and configure W3 Total Cache


1. First thing first-  Download the W3 Total Cache plugin

2. Now time to configure it. Click on “Performance” in your WordPress admin.

3. Then, in “Page Cache” section, Enable the Page Cache and select Page Cache Mode Disk: Enhanced.

page cache

4.  In “Minify section” Enable the Minify section, chose Minify mode auto, Select Minify cache method Disk, Select  Js minifier JSMin (default) and select CSS minifier Default.

minify

5. Now come to “Database Cache” section. Enable the Database Cache option and select Database Cache Method Disk.

database cache

6.  In “Object Cache” option enable the option of Object Cache and Select the Object Cache Method Disk.

object cache

7. In “Browser cache” section, enable the Browser cache option.

browser cache

8.  In CDN section, don’t enable the CDN option. –

cdn

9. Then, leave the Reverse Proxy section.

peverse proxy

10. Again, leave the Monitoring section

Monitoring

11.  Leave the Licensing section also.

Licensing

12. Now come to Miscellaneous section. Enable the  Enable Google Page Speed dashboard widget and  Verify rewrite rules and leave the left option.

Miscellaneous

13. Leave the Debug section

debug

Save all settings and you are done. Feel free to comment if you have any questions/suggestions.

Click here to signup to our newsletter to remain connected and receive all our posts directly in your inbox.


Step by step guidance to make a wordpress website

Many years back, when I got fascinated with the web development world, I decided to create my own website but then I noticed most websites were developed using HTML, CSS and what not. Learning those seemed wayward that time and it took high effort and huge time to master.

One of the reasons why still most people consider developing a website as an  impossible task and think that it requires a knack of coding and designing. But this is no truer !!

Today, CMS (content management systems) like WordPress have made developing a website open to all. Simply putting, CMS is a user-friendly platform for developing your own website and handling your content on your own, rather than using lengthy codes.

Enough of description, let’s proceed to the main segment – Steps to make a WordPress website.

STEPS TO MAKE WORDPRESS WEBSITE

  • 1. Log in to your hosting account. Click here to know how to create your hosting account.
  • 2. Go to your control panel.
  • 3. Create a database.
  • 4. Go to your file manager “public_html” Folder and upload the WordPress file (You will have to download WordPress file from https://wordpress.org/download/ ).
  • 5. Now go to your domain and select a language, click on “Continue” button. After that, click on “Let’s go!” button.
  • 6. Then enter your —

i. Database name ii. Database user name iii. Your database Password .

Don’t make any changes in the  database host and  table prefix, leave it as it is and click on “Submit” button. On the next page click on “Run the install” button.
Database Config

  • 7. On the next page enter —

i .”Site Title” as per your choice. Enter Admin Username and Password (If your password is

Then, enter Admin Username and Password (If your password is weak then click on “confirm use of weak password”. Lastly, enter your email id and click on “Install WordPress” button. After Installation,  click on “Log In” button and enter your admin username and password (By default you can log in your admin panel www.yourdomainname.com/wp-admin ). admin config

  • 8. After login, you will be directed to the dashboard section where will find all the settings. Go to the “Themes” section where you can choose a theme and activate it.
  • choose theme
  • 9. Then go to “Pages”  -> Add New Page. You can create pages of your choice like Home, Services, Contact etc.new page
  • 10 . After creating pages go to “Appearance” to edit frontend visual-> Go to “Menus” and create a menu, put a menu name like “main menu” and click on create button. on the left-hand side, you can select menu options like which page to insert, tick that box and click on add menu – then swap it up or down as per your requirement. Click on “save menu” to save the settings.  “Primary menu” or main menu means header while the footer will result in footer menu .menu
  • 11. Go to Setting->Reading. For “Front page displays” select “A static page (select below) ” this option. For “Front page” select the Home page and for “Posts page” select Blog page. Then click on “Save Changes” button.readding settings
  • 12. You can change the  URL as per your requirement – like post name, post date, –in permalinks. Go to Settings – > Permalinks select “Post name” option and click on “Save Changes” button.permalink settings
  • 13. For a blog post,  Go to Post -> Categories and create your Categories. Then go to Post -> Add New Post. Enter a post title, Post content, select a “categories” and select a “Featured Image” then click on Publish button to make it live.

There are much more things to explore in WordPress. Signup to our newsletter to remain connected and receive all our posts directly in your inbox.

Feel free to comment if you have any questions/suggestions or if you simply want to say Hi !